
Living in Japan will require dealing with finances, which also means learning how to do banking through an ATM. While Japanese ATMs these days have an English menu, they are limited to basic essential functions such as deposits and withdrawals. For example, Japan Post Bank has a remittance option in the English menu but is limited to transfers to other accounts using Japan Post Bank.
Although bank transfers can be made through a bank teller, most banks close around 5 p.m. Most of us are, unfortunately, still at work. Rent and utilities are also commonly paid through automatic bank transfers. But when you forget to deposit on the withdrawal date or have overlooked your bill, you will have to transfer manually.
If you need to make a furikomi(bank transfer), you will have to venture into the Japanese menu (studying our Japanese ATM Bank kanji cheat sheet could make your experience a lot easier).
Here’s everything you need to know about making bank transfers via ATM in Japan.
Step 1: Making a money transfer
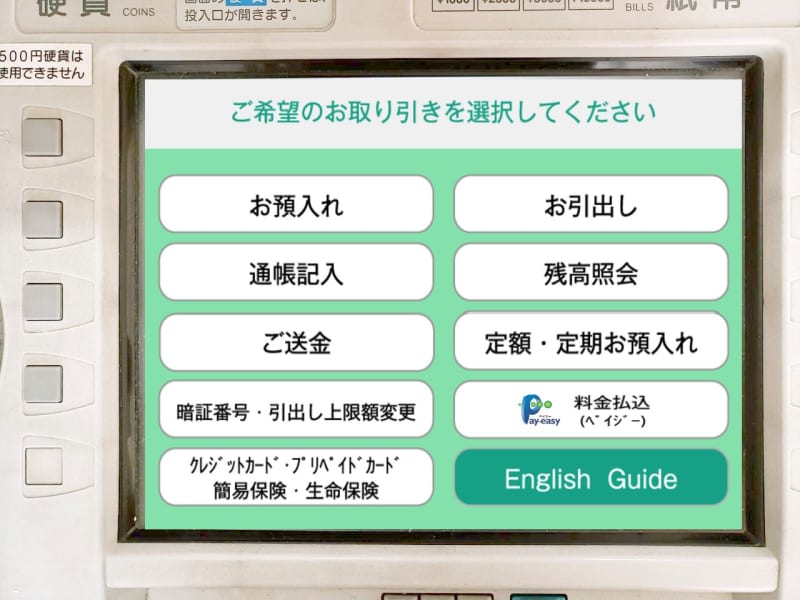
You’ll need your bank book or cash card. Cash is acceptable in some ATMs, but you’ll need a payment slip for banks such as Japan Post Bank to pay with cash. To make a bank transfer, on the welcome screen on your ATM, look for お振り込み or ご送金.
On pressing this, you will see a fee table or a fraud warning.
Step 2: Funding the transfer

The next screen will vary by bank. It might ask you whether you would like to fund the transfer from your account or deposit the cash directly. Other ATMs will let you transfer with money, but this will limit your transaction to ¥100,000 (10万円).
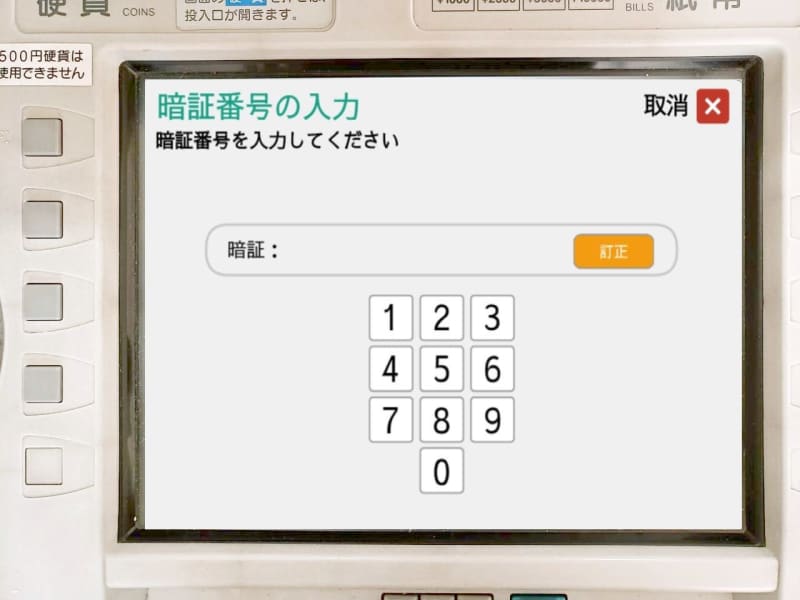
When using your account for the transfer, insert your cash card or bank book, and enter your pin number.
You might also have to choose how you would like to enter your recipient’s details. You have the option to use a payment slip, enter the recipient details manually, or use a transfer/furikomi card. It can either be a plastic card or a laminated cardboard card with a magnetic strip with all the recipient’s information.
Step 3: Searching for the right bank and branch
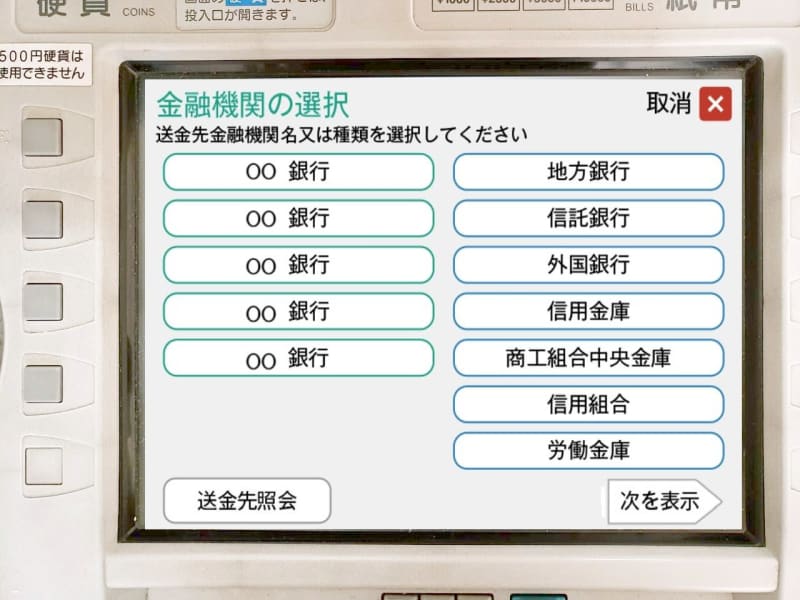
On this step, you will need to search for the right bank and branch for the transfer. Some ATMs will have the names of major banks in Japan immediately listed on the bank selection screen. For other banks, you would need to search by pressing the [その他] button.
Mitsubishi UFJ	三菱UFJ銀行	mitsubishi UFJ ginkou
Sumitomo Mitsui (SMBC)	三井住友銀行	mitsui sumitomo ginkou
Mizuho Bank	みずほ銀行	mizuho ginkou
Resona Bank	りそな銀行	risona ginkou
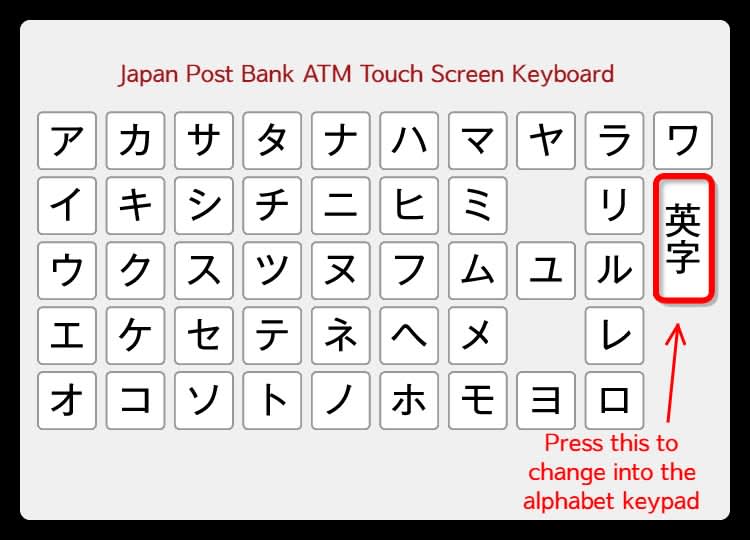
Once you have the right bank, you also need to specify the branch name. For most banks, this is the location of the branch. You might need to search in katakana, so it’s best to write down the katakana reading of the branch name and the kanji. The [英字] button changes it to the alphabet.
If you’re transferring to a Japan Post Bank account, they have a different naming branch system. They provide an online resource you can use to convert the account number into the format most banks use. It will also give you the branch name and bank codes.
Japan Post Bank account number converter
Step 4: Entering recipient details
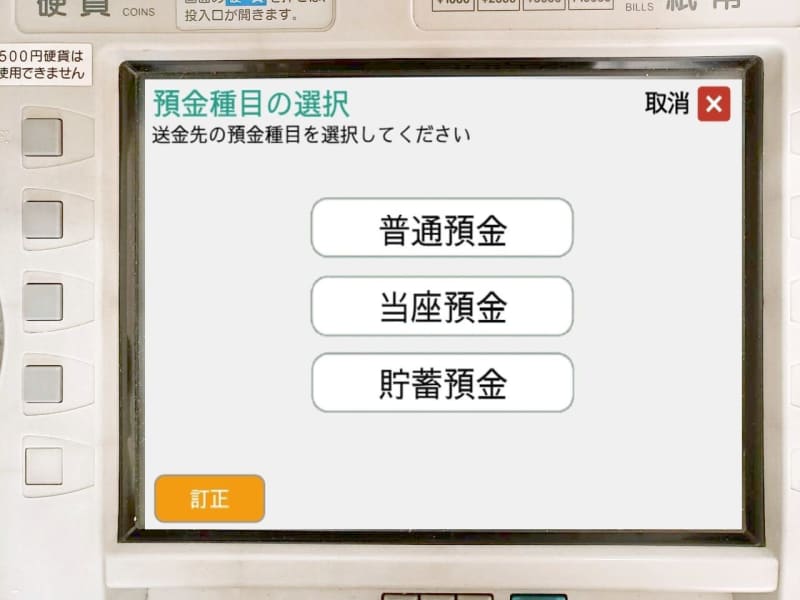
At this point, you would need to enter recipient-specific details. It will ask you for the recipient account type. Most Japanese banks offer two types of accounts: futsuu (普通) and touza (当座), or regular account and current/checking account.
It will ask for the account number [口座番号], the amount to be transferred [金額], and your phone number [電話番号]. If using Japan Post Bank, all these screens will give you a number pad, so check the kanji on the upper left-hand corner to know which is which.
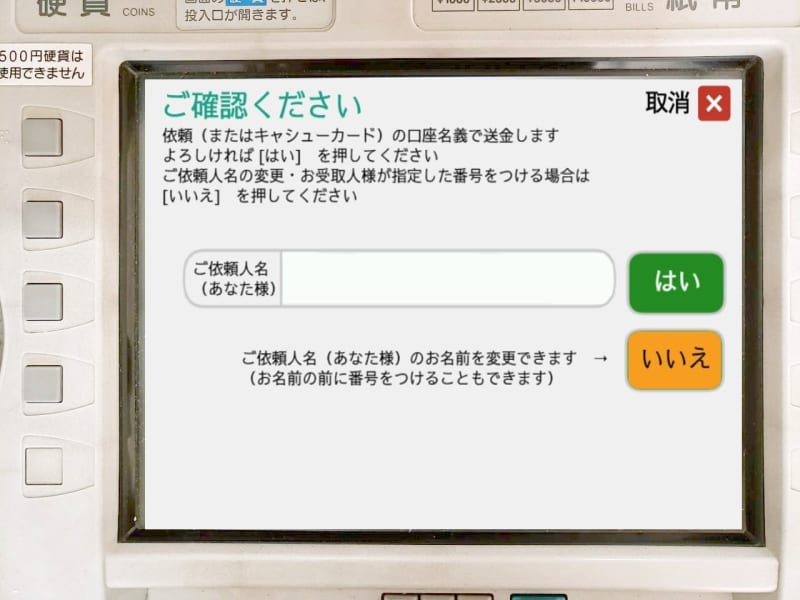
You might also have an option to edit the sender name [ご依頼人名]. Sometimes billers will require a reference number to be added either before or after your name.
There are times when the ATM will show you a confirmation screen after every entry. In case you made a mistake or typed something wrong, look for the [戻り] button to go back. If everything is good to go, press the [確認] button. The red button [取消] will take you back to the first screen, so only press this if you want to restart.
Step 5: Finalizing the transfer
After entering all the information, you will get a summary screen. The list of information to check might include the following:
Financial institution name	金融機関名	kinyuukkan-mei
Branch name	支店名	shiten mei
Account type	口座科目	kouza kamoku
Recipient name	お受取人名	uketori jinmei
Amount to be transferred	送金金額	soukin kingaku
Transfer fee	料金	ryoukin
Sender information	ご依頼人名	go irai jinmei
Sender phone number	電話番号	denwa bangou
Date of transfer	送金予定日	soukin yotei bi
Make sure all the information is correct and press the final button [確認]. You will have up to this point to cancel the transfer. After pressing the button to confirm, the transfer will be finalized and processed.
After the transfer is finalized, you might see an option asking if you want to print a furikomi card for future use. You can opt to have this done when you make payments to a bank account regularly. All the information you entered will be saved on it, and it will take half the time to make a remittance. The machine will then print your receipt (and the furikomi card if you got one) and return your card or bank book.
New skill unlocked! Navigating through a whole lot of kanji, and probably some concerned looks from people queued up behind you, is a definite achievement.
For more help with banking in Japan, check our Japan 101 section.